Beyond The Basics: GMail Autoresponder
Have you ever had to send the same email out repeatedly? Or wished that you could let people know you weren’t checking your GMail account for a while? Today we will look at the power of the GMail autoresponder.
For several years, I was in charge of processing the trip requests for my Girl Scout Service Unit. Leaders would fill out a PDF, email it to me, and wait for me to check everything and approve the trip. What I noticed in the first few weeks after taking the job is that the leaders would send the paperwork, and then follow up with emails asking if I had received the paperwork. I solved the problem with GMail autoresponders.
What is an Autoresponder?
An autoresponder is part of any email program that allows you to send an automatic response based on static conditions (time, date) or specific items in the email (the sender, the subject, attachments).
Autoresponders are part of every full-featured email program, such as Outlook at GMail. Most people don’t use them unless they are going to be out of the office
Setting Up Autoresponders in GMail
Autoresponders are not part of the standard GMail features…yet. They are accessed through the Labs section, which is where future features are tried out.
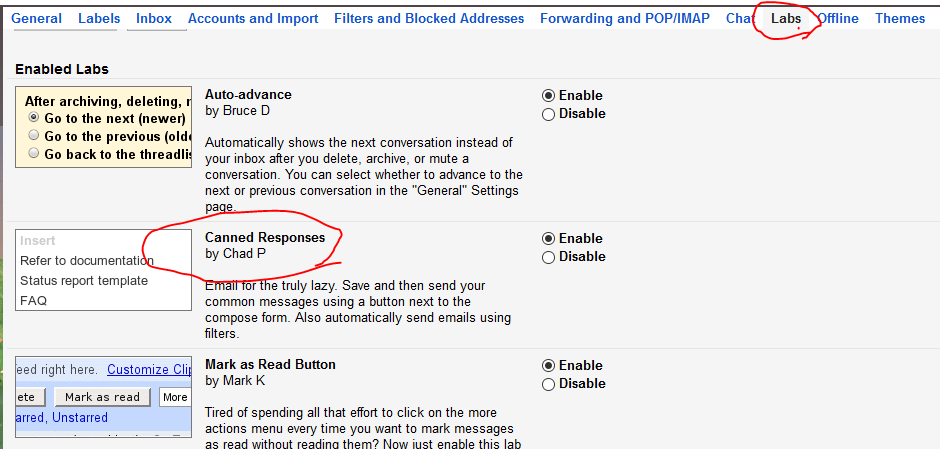
To enable the autoresponder, you will need to enable a feature called “Canned Responses” in GMail, go to your settings by clicking on the gear icon in the upper right corner of the GMail screen, and choosing Labs. Scroll down to find Canned Responses, and click on Enable.
Setting Up Your First Canned Response
The next thing to do is set up what you want your autoresponder to say. I do this by starting up a new compose email window, and type out my response. In this example, I am doing a high-volume response.

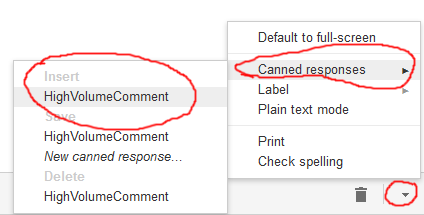
Once I have the text as I want it, I save it as a canned response by clicking the More Options downward-pointing triangle (next to the trash can icon) in the lower right of the compose window. Then I select Canned Responses and New Canned Response.
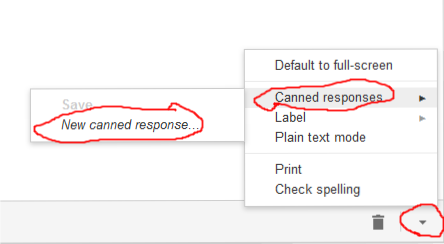
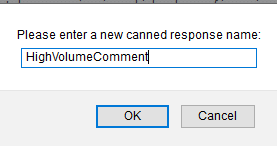
Then I give it a name and it is saved.
Using The Canned Response
To use the canned response manually, you respond to an email as you normally would, and then choose the name of the canned response from the Insert section of the Canned Response menu. It will put the text in just as you saved it.
Changing A Canned Response
If you find you need to change the canned response, you can change the email draft. It isn’t saved in your email drafts folder, so I recommend creating a label for your canned responses. I found my canned response in my All Mail folder and labeled it from there.
Turning A Canned Response Into A GMail Autoresponder
Now that we have the canned response, we can set up the filter to turn it into an autoresponder.
We do this by setting up a search.
First, click the Show Search options by clicking on the downward-pointing triangle in the search box.
![]()
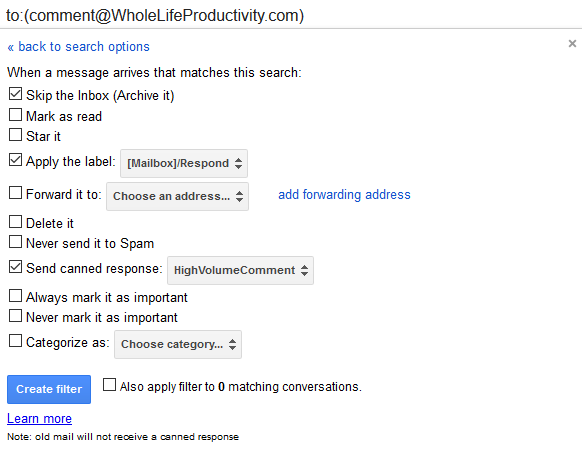
Next, set up your conditions. I know that all of the comments that come from the blog go to the email address comment@lauraearnest.com. So I enter that into the to address. Note you can set up very specific filters here and even check to see if they included an attachment!
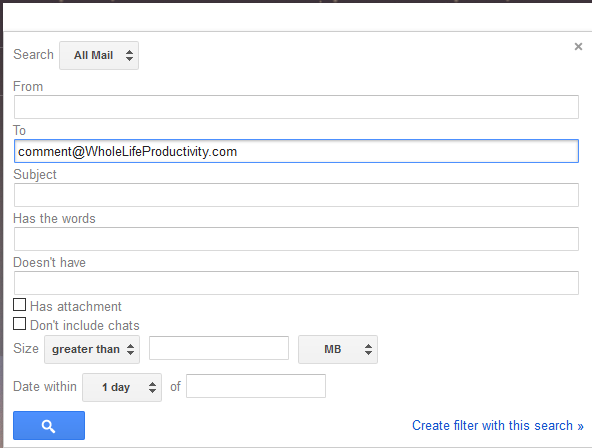
After that, click on the Create A Filter option in the lower right corner of that window, and you will get the options for what you can do.
For this autoresponse, I want to get it out of my inbox, label it so that I know where to look, and then send the canned response. Once those options are selected, I click on Create Filter, and the autoresponder is created.
Removing An Autoresponder
There are two ways to remove an autoresponder: you can delete the canned response, or you can remove the filter that sends it.
Deleting the canned response means you cannot use it manually; deleting the filter means that it won’t go out automatically. You have to decide which is right for you.
Discussion Question
My question to you: how could you use this with your incoming mail?
Image by FixtheFocus. Licensed under Creative Commons. Text added.
